 ANVER Vacuum Lifting Tubes ANVER Vacuum Lifting Tubes
Guidelines for Replacing Vacuum Lifter Tubes
 Top Swivel/Control Head Preparation Top Swivel/Control Head Preparation
Before installing the replacement tube, be sure the vacuum control head and top swivel are clean and free from any previous residue.
Tube Installation
Before attempting lift tube replacement, pre-stretch the tube lengthwise as much as possible. Smooth and pull outward on the tube ends, removing any tendency to curl inward. Trim any excess tube material on the ends of the tube using a razor knife. If the tube is too tight over the vacuum control head or top swivel, the last two coils of the tube may have to be removed by cutting the fabric with a razor knife and cutting the wire with a pair of heavy duty cutting pliers. If the tube is too loose over the vacuum control head or top swivel, wrap several layers of duct tape around the area until the fit is snug. Clamping the top swivel and control head in a bench vice or having an assistant help during tube installation is highly recommended. Slide rubber sleeves (optional) and wire ring clamps (see diagram) over the ends of the vacuum tube and temporarily tighten the lift tube clamps over the top swivel. It is recommended that new clamps be used when replacing the vacuum tube. Gradually pull tube all around until the top of the tube is even with the top surface of the nylon ring. If the clamps cannot be slid over the tube, place the wires of the clamp between the wires on the tube and turn the clamps onto the tube. A screwdriver used as a lever and needle-nose pliers help to ease the tube into position. Secure the top of the tube to the swivel with (2) two clamps (VT250 sizes use one heavy duty clamp) ensuring that the wire rings on the clamp sit evenly within the crests of the tube without crossing over. The clamps should be placed in opposite directions with the screw portions of the clamps positioned 180° apart. In a similar manner, attach the other end of the vacuum tube to the control head. Secure in place with (1) one wire ring clamp. Take special care to position the tube evenly all around, ensuring that all holes in the control head are covered by the tube. When replacing the vacuum tube on the VT-160 size only, be sure to position the lower clamp below the raised band on the vacuum head to provide the best possible attachment between control head and vacuum tube. Rubber sleeves are provided to conceal the wire clamps if so desired. Their use is optional.
Warning: Use extreme caution not to puncture the outer wall of the tube during preparation and installation procedures. Doing so will weaken the tube and may cause vacuum leakage. If the vacuum tube wall is accidentally punctured, cut away the damaged end and reattach to the control head or top swivel. Check to ensure the tube is securely fastened to the control head and top swivel by pulling or twisting the tube. A very serious personal injury or unit failure may result if the tube is not correctly installed. ANVER recommends replacement of both tubes, as a pair, on the Double Tube systems.
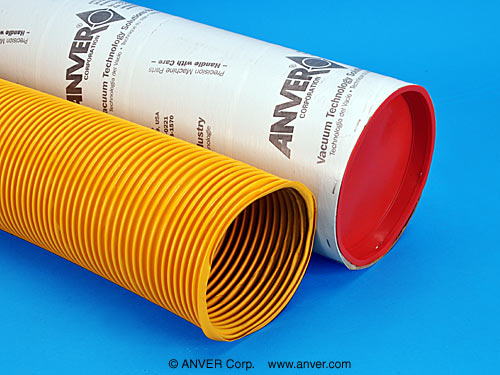
ANVER Armadillo Vacuum Lifting Tubes have been manufactured with a black, orange and Anver yellow outside wrapping. ANVER has also supplied tubes over the years in a variety of other colors including white, black, grey and blue as well as different fabrics and coatings. Currently, black, orange and ANVER safety yellow are our main colors. We reserve the right to change the color and construction as we continually change to improve our products.
|
ANVER White Tube Covers also available!
Contact Factory for more information.
|
 |
Return to Vacuum Lift Tube Page
|


